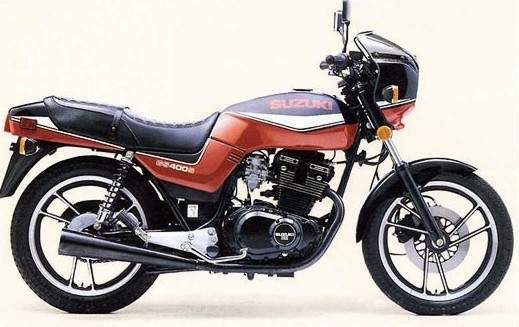
Sunday, February 5, 2012

A Haynes Manual

I can finally confidently say that the 400S has the same engine (and is basically the same bike) as the GSX400.  I found this service manual on bikecliff's GS site. 


If you don't have this resource already here's the link to download it!

Saturday, August 13, 2011

All wet.

Well, the ride up to Wilberforce was awesome. Bike ran like a champion as usual and once I was off the 401 it was quiet and scenic. Closer to the cottage I hit a bunch of twisties and rolled up to the cottage just as I was losing the sun. Perfect.

The ride home however was not so fun...

It started out great until I caught up to the storm... Then I got to play bridge troll under a number of different bridges all the way down the 115 for about 3 hours. I was SOAKED. But, it was still great and as soon as the rain finally stopped I was up and running, air drying in no time.

I think this trip has finally sold me on picking up an aftermarket wind screen for the bike. I have the stock fairing but unfortunately it was damaged before I bought the bike and I can't mount it. Some waterproof riding boots would have been nice too...

Good thing my birthday's coming up.

Tuesday, August 2, 2011

My Tour de Wilberforce

Have another long ride lined up for this weekend. Unfortunately riding solo again so I'll have to make sure I double check everything on the bike before I hit the road. I'll do a checklist and add it here.

Here's the trip :


Like the last trip I'll be taking some pictures and updating my location with geotags along the route. If you're interested in that sort of thing you can follow me on twitter @jamieparkhill I should be getting started in the mid to late afternoon on Friday.

Ok, so plans have been evolving! I'd start another post but I think it would be more efficient to just load it all up here.

Before I head home on Sunday I'm going to ride west of Wilberforce to Midland to visit some friends! Here's the route from Wilberforce to Midland:

View Larger Map
View Larger Map

Pre travel check list:
- Tire pressure. It's a continuous high speed ride so make sure the front's at 28psi and the rear's at 32psi.
- Chain. Make sure the chain isn't too tight or too loose! Also check the rear wheel alignment while you're at it.
- Fluids. Make sure you're oil is topped up. If you haven;t changed the oil in a while pay attention to how far you'll be traveling and consider an oil change before you leave.
- Lights. Make sure your head lights and turn signals are all working properly.
- Fork pressure. Did you know that there is a psi in your forks you're supposed to be maintaining?? Each fork should be at 7.1 psi. The first time I checked mine one was at 36psi and the other was at 25psi! Obviously the previous owner didn't know to check this.
- Tools. Don't bring your whole tool box but it certainly will come in handy if you have a few select wrenches, pliers, duct tape, electrical tape, and anything else you may think could come in handy. It's better to assume you will break down and be prepared.
- Food and drinks. On a long ride it's always a good idea to pack some water and some snacks. You'll enjoy the ride a lot more and you won't be spending all your time thinking about the next gas station.

Tuesday, July 12, 2011

Oil Change

Ok. This is pretty basic but I'm going to document everything I do with the bike. Hopefully this helps someone. Here's a simple step by step for changing the oil.

*Note: As you will discover finding parts for this model is very difficult. Even my local Suzuki dealer can't find this bike in there system. For most items you will have to take your VIN number to the dealership and have them contact Suzuki directly with it to find the right parts for you.

So, when you go in to ask for your new filter you should ask for an oil filter for the GS450. It's the same filter and they won't look at you like you're crazy. The official Suzuki part number is 16510-45040

Step 1:
Start the bike and let it warm up to running temperature. Once it's warm shut it off. This will thin the oil and allow you to drain more of the oil. Keep in the mind the OIL AND PIPES WILL BE HOT so use a bit of caution.

Step 2:
Locate and remove the drain plug found on the underside of the motor in the center of the oil pan. You'll need an 18mm wrench for this.


Step 3:
With the drain plug out drain the oil out into a pan.


Step 4:
Locate the Oil Filter cover on the front of the motor. Make sure the oil pan is underneath and remove the three nuts that hold the cover in place. You'll need a 10mm wrench. There is a spring behind this cover pressing against the filter. When you loosen and remove the nuts be careful not to loose the spring.


Step 5:
Remove the used oil filter.


Step 6:
Install the new filter. Line up the opening on the filter with the housing and press filter firmly over the housing. It should fit snug into place.


Step 7:
Re-install the spring and filter cover in the reverse order you took it off. Also, don't forget to re-install the drain plug. Tighten it up well otherwise you're likely to have a slow leak and make a mess of your garage floor! It's not a bad idea to inspect the rubber washer on the drain plug, if it looks warn it's a good idea to replace it.

Once that's done remove the oil cap and get ready to refill your motor with fresh oil.


Step 8:
Use a 10W-40 4 stroke motor oil to refill the motor. I use Motul's 5100 blend 10W40.
Check the level with the dip stick, you should use between 2 and 3 litres of oil. Replace the cap and your good to go for another 3,000kms!

Suzuki GS400E

Found a cool write up about the GS400S from a 1985 Canadian Motorcycle Magazine. I apologize in advance for the brutal english at times. I have to assume someone typed this out with either a broken keyboard, or their eyes closed.

Suzuki GS400E

Tuesday, July 5, 2011

First big trip

I can't tell you how many people told me I was crazy for wanting to ride the 400 from Hamilton, Ontario to Ottawa, Ontario. All I can tell you is they were all wrong!

Sure, I bet it would have been more comfortable on a 750 or a 1200 but I can honestly say that the 400 GS handled all 1000kms with no problems and I loved every second of it.

I had a wedding to attend over the Canada Day long weekend so I decided to map out a route and have my first adventure on the bike. Up to this point the longest trip I'd done on the bike was about a 2 hour ride to go camping one weekend. This trip was going to be a good 1000km round trip. About 7 hours there and 7 hours back if I stuck to all the back roads, a little shorter if I decided to hit the major highways.

Before leaving I made sure my chain was lubed up, plugs were good, oil was good, and all my lights and signals were working. I packed a few wrenches, spare plugs, chain lube, and most importantly a small spray bottle full of Windex and a cloth to clean the bugs off my visor. Strapped my bag down to the back seat and off I went.


Here was the route I ended up taking out there. A major traffic jam forced me off the 401 a little earlier than I would have liked but being on an air cooled 25 year old bike I didn't want to take any chances of overheating. Needless to say this ride was much more scenic and I made many stops in a lot of neat little towns along the way.

Looking forward to my next trip!

Thursday, June 30, 2011

My bike won't start!

After about a month of riding my 1986 Suzuki GS 400S I hit my first official snag. After about a half hour ride I parked the bike and left it for about 20 minutes. When I came back it was dead, no juice, nothing. I managed to bump start it and got it home. Now I needed to figure out what the problem was!

I encourage you at this point to actually troubleshoot before you start buying parts. I immediately assumed it must have been the battery. This was also fueled by wishful thinking because I don't know much about electrical and I certainly didn't feel confident doing any electrical work on the bike.

After replacing the battery I quickly discovered that that wasn't the issue. I turned to the GS Resources and discovered the "Stator Papers". I followed the step by step tutorial on how to test the ENTIRE charging system and discovered that my regulator/rectifier was fried!


Waited a couple weeks for the part to show up and the bike is good as new again.

Here's a link for the Stator Papers if you're in the same boat. It's recommended to do these checks periodically to proactively catch some issues before you find yourself dead at the side of the road. The Stator Papers

The GS Resources

One of the most useful websites I've found so far is the GS Resources, http://thegsresources.com

This is a great forum and the members contributing really know what they're talking about. It was through this site that I finally found a Haynes manual from the UK which covers the 400S (they call it a 400E I believe. I've added links for both the GS resources and the Haynes manual to the links list here.